Click for SiteMap
Table of Contents
Car Mechanics and Maintenance
Whatever my current projects are, not meant to be comprehensive.
Follow a Routine
With all the dust from dirt roads, cleaning the air filter should happen frequently! You may as well check fluids and tire air pressure as well. Make sure the engine and ac cooling fans are working.
It's wise to visually inspect tires at every stop.
Quick Washing Your Car
- Rinse car with cordless pressure washer.
- (optional) Use a bunch of rags (microfiber towels) in a bucket with rinseless fluid. Avoid scratching paint with soiled rag.
Option for pressure washer dispenser bottle
DIY rinseless wash ingredients:
1 tbsp Baby Shampoo
1/2 cup Distilled Vinegar
Wash and wax
Interior
You can use vinegar, but not even a couple drops of bleach because it can discolor plastics.
Practical Tire Aspect Ratio
Racing Cars Do Not Use Low Profile Tires
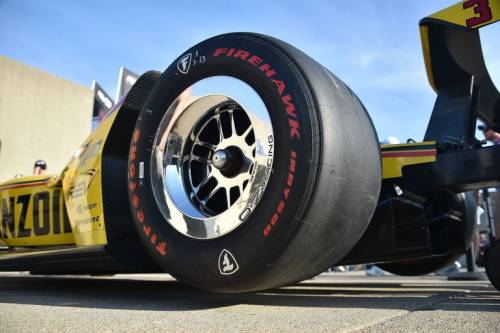
Roads are not perfectly smooth racing tracks, and even indy or stock-car racing use sidewalls that are 6“ tall. Sidewall flex is desirable for grip.
In the 70s sports cars came with 65 or 70 series tires (like the 240Z, 260Z, and 280Z). People on forums say this is because tire development had yet to evolve to make lower profile tires. I think that's bullshit from people's belief that development is always for the better.
Also see: Tires Are Critical to Effective Suspensions
Low Profile Tires are Like Jewelry
The truth is that low profile tires are just bling appreciated by an immature clientele. Low profile tires cause a lot of damage so they are also appreciated by suspension and tire shops.
Wider Tires Are More Comfortable Than Narrow Tires
Some people incorrectly assume wider tires give a rougher ride. That's because they continue to use the same pressure on a wider tire that they were using on a stock width tire. The pressure should be less on the wider tire to have the same tire deformation expected by the manufacturers.
Tire Pressure Calculator from tiresize.com
A more comfortable ride can be had by increasing the total volume of a tire.
Increasing the width and keeping the tire height constant, decreases the pressure needed to run the tire. For speed bumps the 2 dimensional vertical deformation is the same for both the wider and narrower tires. At least on speed bumps. On irregular surfaces the wider tire with more volume will be more comfortable.
To be more precise, the narrower tire does have a contact patch that is longitudinally longer, so it may “caterpillar track” over a bump. But the increased volume afforded by the wider tire overshadows what may be a marginal dynamic deformation improvement? I think so.
Tire Repair
Travel Without A Spare Tire
AWD Subaru differentials need same size wheels to avoid damage and I'm not sure how long they could be driven on a different size spare. After a long search I found a spare to match the diameter of my wheels.
Preventative tire sealants would help in surviving without a spare. Also a tire repair kit with tire plugs and vulcanizing cement and patches. But it's a pain to be doing repairs on the side of the road without a full set of tools. So I prefer to have a spare tire.
Liquid Tire Sealant
I watched Project Farm's review of tire sealants and Slime seemed the least nasty looking when he pulled off the tires (although it starts to dry with time). Plus it's inexpensive. Multi Seal FlatOut is more robust but you need more and it's more expensive.
Although these specifically for motorcycles.
Ride-On Negative Review by LCARS ADV on YouTube.
Sahara, Ride-On, and Yellow Label Slime Review by Fortnite on YouTube:
- Ride-On balanced the tire but failed to seal any hole.
- Sahara sealed up to 12mm hole, but did not balance the tire completely.
- Slime sealed up to 6mm hole.
Sahara Sealant Review by Stoplogic Motorsports on YouTube. Sahara didn't balance as well as Ride-On but a wheel spin test didn't show a heavy spot.
For a regular hole on the tread of the tire, I'd much rather use a plug than use sealant after the fact.
However, wouldn't it be beneficial to have sealant in the tire as a preventative for future flats? Off-road, by the time you realize you have a flat the rim and tire can be damaged as they roll flat over sharp rocks. Off-road versions of Slime can do this for 2 years. Multi Seal for the life of the tire. So Multi Seal may be the better option as my tires will probably last 5+ years.
My 2008 Subaru is not U.S. spec, so by the owners manual there's no TPMS.
Based on sources from Slime and LiquiTube, I should use about half of the recommended amount of a sealant to avoid imbalance. I will be trying my luck with a 16/22 dose of FlatOut Sportsman volume recommended for over-road tires, so I use up 2 bottles on four wheels.
The following from the MultiSeal FAQ seems to have been written before the introduction of FlatOut brand, which has different varieties that seem purely for marketing reasons:
Is MultiSeal a One Size Fits All Solution?
MULTI SEAL® does not believe in one size fits all solutions. Based on this, we have created and are continuing to expand a full line of tire sealants to meet our customer’s needs:
Heavy Duty (Standard and Environmental Formulas) – Our workhorse product. Seals puncture up to ¾”.
Armor Seal – Our premium product designed for the most hazardous environments. Seals puncture up to 1 ¼” in tires that are 18 plies or greater.
Hydro Seal – Specifically designed for ballast-filled tires. Seals puncture up to ½”.
Sports Formula – Designed for the power sports market. Seals puncture up to ½”.
My impression is that those sealants that would plug larger holes work with thicker slow speed tires such as army vehicles, are more viscous than passenger vehicle sealants. Probably different sized sealing particles as well. “Armor 3500 seals puncture up to 1 ¼” in tires that are 18 plies or greater”.
There seems to be a natural limit for any liquid based option of (hole width / hole depth), but added viscosity helps. Except added viscosity hinders tire balance. Which by my guess are factors for having different formulas: Sportsman → HD 2500 → Armor 3500.
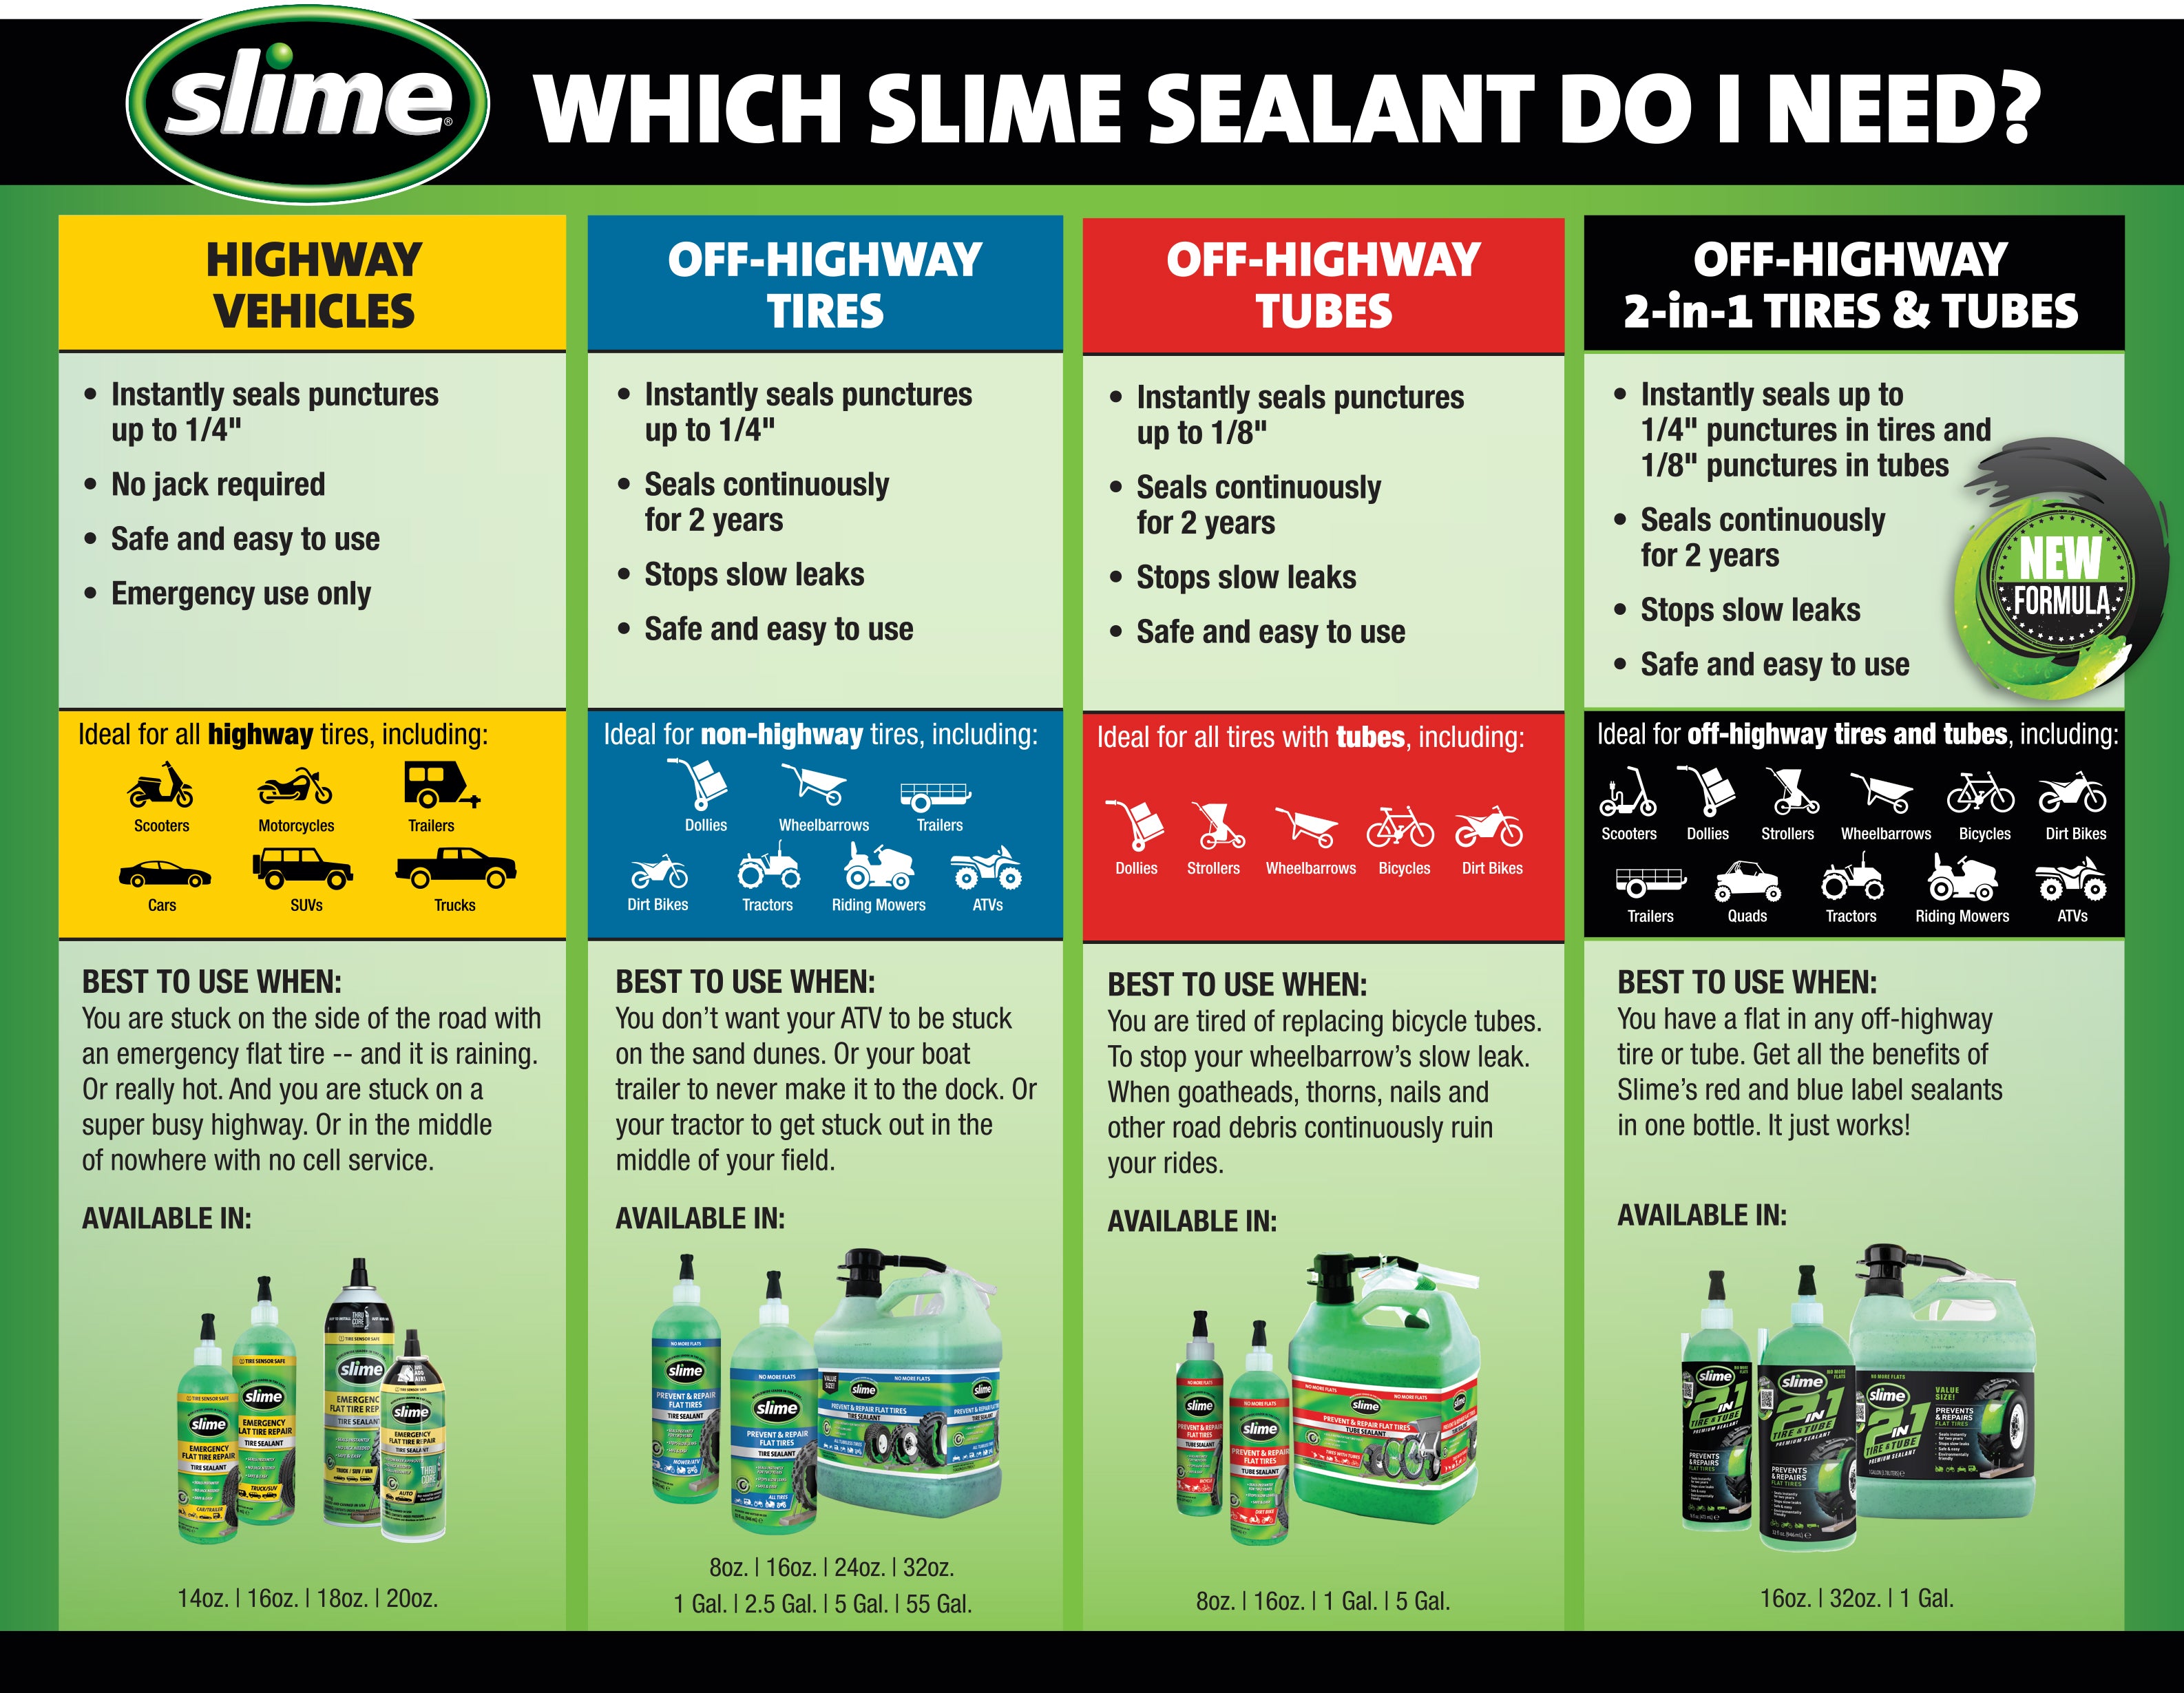
The yellow label slime for highway vehicles is optimized for maintaining tire balance, where the downside is that it should not be used for a lengthy period of time. Slime says: “Once the yellow label emergency sealant in installed, it must be removed within 100 miles or 3 days, or you risk causing tire imbalance.”
I could try using blue label Slime for highway use and see if I have balancing issues. According to one of the reviews on Amazon below, using half the recommended amount prevents an unbalance and still has plenty of sealing power. For me 14.5oz / 2 ~ 8oz, so a 32oz bottle for 4 tires.
DruManjiDrew on YouTube used yellow label Slime and rubber cement for a sidewall tear. Although vulcanizing fluid would be better instead of rubber cement. Apply vulcanizing fluid both before and after the slime? I think this would work only for horizontal tears. With vertical tears, the stress on the tire can deform and reopen the tear under load.
Great stuff if used properly…. I have some tips! Review by EvoDave on Amazon
If you’re going to use this in an a car or truck make sure to mount and balance the tire previous to putting it in and then that way once the vehicle is driven over a few days it will dispurse and stick inside the tire evenly and the balance will be proper if you install the stuff then try to balance the tire that won’t work.
GREAT STUFF. But, recommended amount=wheel shakes, review by Amazon Customer
I've used green Slime® in a few cars for as long as it has been around here. It's better to be safe than sorry on a busy, wet, cold, & icy highway or in the wrong neighborhood. That's especially important if it is your wife or daughter! Slime works great and doesn't freeze at -20℉/-29℃. I tested a bottle outside overnight when the temperature went down that low. The manufacturer's instructions say to use about 8 oz/236 mL for our tires. I know the mfg would like us to use up more Slime as they make more money; but, there is a problem with their instructions, I've found.
Unfortunately, going 35 mph/56+ Kph and using that amount, makes a balanced wheel vibrate like it is unbalanced. It shakes and makes driving unpleasant. So, over the years I decreased the amount used down to 4 oz/118 mL. There is plenty of sealing power in that smaller amount. And, it doesn't clog up our automatic tire pressure sensors. The gallon is the most accurate way of getting that amount as pushing the pump down four times= 4 oz/118 mL. We have to remove & replace the Slime 2 X a year due to snow and ice in the winter when we change our all-season tires in November to studded snow tires. Yes, we use the Slime in the snow tires. When our tire guys remove the tires from the rims, we provide him with paper towels to soak up the previous season's Slime and to remove some Slime film that gets on the inside of the rim (he uses his cleaner). They are most happy to do that extra work for the tip they get. But, to be accurate, we do the pumping of the Slime into the tires.
Bubble Buddy reviewed on Amazon, saying he added 60% more than recommended, and he had good results but needed to drive about a mile before the tires balanced themselves.
It Works! Review by Erpilot on Amazon
I used this on a Mercedes with TPMS and run flat Pirelli tires. There was a screw in the tread that caused the tire to deflate. I used this a little differently than the instructions: I positioned the tire so that the hole was at the very bottom. It was a small leak, losing about 5 psi/day. I added enough slime so that I estimated that the hole was covered. I than inflated the tire to about 15psi more than normal to force some slime out of the hole. I then drove it about two miles and then parked it overnight. The next few days, the tire pressure was unchanged, so I reduced the pressure to normal. It has held the pressure. I noticed not change in wheel balance at any speed. It did not affect the TPMS. All in all, this was a five star performance.
“There was a small amount of the Slime on the wheel, and it had glued the tire to the wheel, and would migrate under the lip of the valve stem causing it to leak.” Anderson on Quora So great care must be made in cleanup when installing new tires?
Dave_in_WV on 24hourcampfire.com
I use QuadBoss in my ATV front tires and have Slime in the rear. The rear tires were on my first ATV and I replaced the front tires later on my ATV. I like the QuadBoss far more than Slime. Slime dried out into a gooey ball and gave me vibration even before it dried out. Even in cold temps the Quad Boss will stop vibrations after riding a short distance and Slime in the Winter never did stop. When I replace the rear tires I'll use QuadBoss. https://quadboss.com/tire-wheel/tire-sealant
Forum thread about Slime: https://www.rswarrior.com/threads/slime-tire-sealant.265026
Both Slime and Multi Seal have Amazon reviews of the sealant not working.
Multi Seal also makes FlatOut.
Multi Seal states: “Correct sealant dosage – Overdosing of the sealant can lead to potential high-speed vibration. Please strictly adhere to the recommended high-speed dosages given in our Application Chart.” FAQ Dosage recommended is 22oz, based on 26.3' x 9”. Since the product is thicker than Slime, it would take more to coat the tire surface. I would experiment using 16oz instead of 22oz.
From MultiSeal FAQ:
CAN I USE FLATOUT™ TIRE SEALANT BY MULTI SEAL® IN MY PASSENGER VEHICLE?
MULTI SEAL® does not recommend the use of our products in passenger vehicles or light-duty trucks/SUVs (including ½-ton trucks).
Does our product seal punctures and slow leaks in passenger car tires? Yes. Is there a chance for high-speed vibration? Yes. Does this happen in every passenger car tire? No.
We are conservative in our approach, and we would rather sacrifice some business than have unhappy customers.
You may be asking yourself: Why would there potentially be high-speed vibration in passenger car tires treated with FlatOut™ ? Many factors influence this, such as lighter construction of the tire, lower tire pressure, lighter vehicle weight, lighter construction of the suspension, tire deflection during road impacts and size of tire/road contact patch. In some cases, if the tire is slightly out of balance, the sealant can amplify the problem.
Frankly, we are wary of any tire additive or sealant that recommends use in passenger vehicles. Also, in most cases, the recommended dosage is so small that you do not get effective tire coverage. Plus, don’t be fooled by outrageous claims that a sealant has special ingredients that make it balance tires; the physics of any liquid at high speed in a passenger car tire are the same.
In addition to potential balance issues, MULTI SEAL® does not recommend the use of our tire additive with internal Tire Pressure Monitoring Systems (TPMS). While some TPMS sensors in the industrial sector are liquid-friendly, most TPMS sensors in the passenger vehicle market are not. Once again, MULTI SEAL® is conservative in our approach, and we do not want to risk an unhappy customer.
Beware of sealants that state they are “TPMS Safe,” as this really depends on the type of TPMS and sensors. There is nothing magical that is added to make a sealant “TPMS Safe” … a liquid is a liquid. Be sure to read the fine print.
To learn more, read our blog here on passenger vehicles and tire sealant.
FlatOut ? Review by Gibson's Lawn Service on YouTube. Not for sidewall slices the size of a quarter.
FlatOut Sportsman Review by Fast Dad Garage on YouTube. As my suspicion, gashes are the worst for sealants. Also idiots that don't leave the tire down and turn it up immediately.
FlatOut ? review by myrna on greentractortalk.com:
I quit using slime a long time ago because it loses it's seal every time it gets wet when you run through snow or wet grass and has to be reapplied. FlatOut holds it's seal. I had a rear mower tire that I had plugged, but it still leaked. I put FlatOut in that tire and the leak quit. You will be happy with the results after applying the FlatOut. Any other tire that leaks can be fixed without removing the tire.
FlatOut multi-purpose Review by Kenneth Shrimplin on Amazon:
I have an off road Jeep with 35 inch tires and no spare. I thought this might add a margin of safety. I looked at all the dosage charts and read the warnings (Says not to use in cars but only because of TPMS) I emailed the company about dosage in my tire size. They came back with 84 OZ per tire. That just seems like a lot to me to I started with 32/ tire. When I drove the Jeep it immediately started to shake at 45-50mph, but cleared up over 50. I thought maybe I do need a little more. I added an additional 8 oz/tire. This made the Jeep undrivable over 40 mph. I had to remove the tires and clean them out. This stuff is probably great in your tractor but use in any high speed application will likely produce undesirable results.
FlatOut multi-purpose Review by Michael S on Amazon:
I had a small 1” slice in my rear tire on a hustler riding mower. It was very close to the sidewall but I used the entire bottle and followed through with the directions. It has not sealed the small slice at all and as it was before it goes flat again after about 15 minutes of use. Have aired up tire several times and ridden mower to try and slosh the stuff around as much as possible. I recently put a tire plug in it and that seemed to help.
HD 2500 Review by GSD on Amazon
OMG, this Multi sealer really sucks. I can't go and see my favorite tire dealer any more!(As much, there are some really big holes on sidewalls this will not seal) Put 32oz in trailer tires or 40oz in light truck tires and you won't have the same relationship you had in the past with your tire dealer. We were literally buying 60 trailer tires a year, patching and plugging so many more. Would go through 2-3 sets of truck tires per truck as well. So many tires were being retired early with good tread, it was ridiculous. Now I'm actually saving money on tires this year. 3 months into the construction season and not one trip to the tire dealer. They even sent me an email thinking I was upset at them because they haven't seen us this year. Get the pump for the 5 gal pail, you'll need it. 8oz per pump is installed each full stroke. Not 1oz like the little pumps on the green stuff,(which never really worked for us). Easy to assemble pump and to use. Save time and a lot of money. Pulled a 16 penny nail from a trailer tire, pumped 40oz in a rear dually tire, told driver to go. Actually watched a 6 to 8 inch stream shoot from the tire as he drove off, then nothing. Both of us couldn't believe how fast it works.
HD 2500 Review by Hurley Byrd on Amazon
I've used Multi Seal and I have used Tire Slime. When it really counts…… it's Multi Seal….. when it's the lawn mower, it's Tire Slime. We have a large Rough Terrain Forklift and one of the steer rims had been badly damaged at the bead. It was so bad we could not get it to seal. For the size tire, Multi Seal called for nearly one gallon and that is what we used…… Worked perfectly and saved us many 100's of dollars from not buying a new rim. BUT….. break out the greenbacks. This is really expensive stuff and its cost is the only reason it lost a star. It's been a few months now and the tire is still perfectly sealed.
Both Slime and Multi Seal have Amazon reviews of the sealant not working.
On Amazon the LiquiTube Premium Heavy-Duty Tire Sealant 32 oz is about twice as expensive as FlatOut Sportsman.
Sealant Application Calculator
On a page they state that the size of the hole it can patch depends on the thickness (number of plies) of the tire.
I looked at the PDF chart and for high speed application the volume is half the low speed application. Would that be to avoid imbalance?
… The High Speed ATV/UTV Section Is For Vehicles That Regularly Travel Over 40mph/65kph On Smooth Or Paved Surfaces.
If You Want To Balance A Tire With Wheel Weights, The Tire Must Be Balanced Prior To Sealant Installation.
High Speed Steer Axle Tires Should Be Either 10 Ply Or Heavier, Or They Should Be On 19.5“ Rims Or Larger With Standard Sidewalls (Not Extreme Low Profile, Rubber Band Type Tires) In Order For The Sealant To Self Balance In The Steer Tires.
Do Not Apply More Than The Recommended Sealant Amount In Standard Ply High Speed Tires (Over 40 mph / 65 kph).
Not Recommended For Use As Preventative Maintenance In Compact Cars
https://www.greentractortalk.com/threads/best-way-to-repair-slow-air-leak-in-tire.222624/
It's very hard to find mention of both LiquiTube and MultiSeal | “Multi Seal” on any web page.
Tire Plugs
Tires can be repaired with plugs. “Unlike the vulcanization of a patch to a tire, tire plugs rely on the general pressure of the tire hole pushing on the plug to create a compression seal, rather than a chemical seal.” slime.com. Along with the tire pressure, plugs usually come with rubber cement as an adhesive and a lubricant for insertion.
Most any correctly installed plug will work reliably, as tested by Project Farm.
Aside from regular plugs, they make plugs that are self vulcanizing, such as 1 and 2, and some come with separate vulcanizing fluid.
Sidewall Repair
Sidewall repair is difficult, but can be accomplished by vulcanizing rubber and mesh fiber into the sidewall, using both heat and pressure with a tire press machine. See How I do a vulcanized tire sidewall repair, by Misfit Toys on YouTube Amazing skill of Repairing a Hard Impact Sidewall Truck Tire, YouTube
One company even claims the ability to repair sidewall damage without the need for a tire press machine, by using plugs and separate vulcanizing fluid. See Fix Punctures and Sidewall Gashes with Tech's Permacure Repairs, YouTube. Another company: How To Fix Sidewall Punctures Without Replacing Your Tire, GlueTread on YouTube. Although I wouldn't have faith in that kind repair for long term use: I'd want the patch on the inside.
A good compromise for sidewall repair could be a reinforced internal patch, such as sidewall from an old tire. Sanded and buffed to remove the shiny surface, then glued on with vulcanizing fluid and allowed to set under pressure from clamps.
The clamps can be applied onto additional layers of sidewall placed over the patch to distribute pressure more evenly. No need for using pieces of plugs or other strips onto the tire exterior for a simple tear. Cold vulcanizing fluid doesn't need heat as it is a chemical process.
Here's a good example of what I'm talking about, although he places the patch on the outside: sixtyfiveford on YouTube. Good advice about running the chords perpendicular to the tear. If I adopt his sewing technique, then an external patch would be necessary to protect the threads?
The patch will be adhered but can come off while mounting the tire, so have the patch opposite of where you are using the lever arms to mount the tire. That was a bad omen by itself.
Outcome: Probably the patch worked loose because of the flex of the sidewall tire. I was using an inner tube so the tire held anyway. The flat came 100 miles later. Inspection showed a pinhole in the lower sidewall of the tube. Perhaps from friction with one of the patches? A burr on the rim?
A sidewall patch should have nylon fabric with thin rubber (cushion gum) laid over it to vulcanize to the sidewall rubber. Since the sidewall experiences so much flex, the patch should be just as flexible or the shear force will exceed the vulcanized bond.
I'm using an inner tube on a tubeless tire. For the sake of experimenting, and because it's what I have on me, I'll try duct tape on the inside of the sidewall.
In the future I could try a nylon cloth/fabric with shoe goo
A repaired tire should be used on the rear wheels for a front-engined car, or wherever less weight is applied to the wheel.
Tire Removal and Mounting
Make sure to mark the position of the tire with the rim. Many tires come with markings that should line up with the wheel stem valve.
You have to use lubricant. You will struggle terribly without lube and likely damage the tire. There's not a shortcut.
There are dedicated tire mounting lubricants for sale like Ruglyde, but who wants to buy yet another product?
I tried vegetable oil. Not messy as I painted the surface with a paper towel rather than pouring oil directly. But still leaves your hands icky, and I suspect the rubber absorbs the oil to some extent. Any vegetable oil works as a lubricant for mounting/dismounting. Petroleum based oils supposedly harm the rubber.
Soapy water: apply with a sponge so you don't have excess liquid. Soapy water is corrosive. See The Tinkering Old-Timer on YouTube. However, using vegetable oil sounds messy. Maybe add some antifreeze to the soapy water? Although no one mentions antifreeze, perhaps because of its toxicity. However, most rims are painted and aluminum, so rust is a mute point.
Given soapy water washes off you easiest, it's my preferred choice.
Silicone oil/lubricant or silicone protectant also works? The goal for the lubricant is that it lubricates temporarily so the tire doesn't slide on the rim when in use. Silicone lubricant does dry out, so is the residue slippery between the tire and rim? See Reddit. Also, people who mention using it in the forums haven't had the slip experience. There are plenty who warn in capital letters, but they don't mention having used it themselves.
Lots of suggestions, including wd-40 and even shaving cream, at advrider.com forum: 2010 2013 2015 2022.
Ruglyde ingredient percentages:
- Water 72.48
- Coconut Oil 11.03
- Potassium hydroxide 7.08
- Sodium dichromate, dihydrate 6.93
- Petroleum distillates, solvent dewaxed heavy paraffinic 0.16
- Triethanolamine 0.04
A formal article: https://www.tirereview.com/easy-does-it-proper-lubrication-can-reduce-mounting-concerns
The tire bead must unseat completely and sit in a groove with a lesser diameter in order to start pulling one side over the rim. The act of pushing the tire bead away from the rim wall and into that groove is called debeading the tire.
One side of the rim may have a deeper debeading groove. Use that side for both mounting and dismounting. Unfortunately, this groove is usually on the outer face of the rim that you don't want to scratch.
There are several methods to debead a tire.
Floor jack and a tie-down strap
auxpowerunit on YouTube.
Floor jack and a rigid overhang
You can use a low profile floor jack to debead the tire. I use a concrete park bench: slide the wheel under the bench but over the jack.
Scissor jack, drill or impact wrench, and a rigid overhang
The Daninator on YouTube.
Drive a car over a wooden plank
Shown by Smitten in the Mitten on YouTube.
Mounting a car tire on a rim with NO TOOLS in seconds by Spanky’s Hot Rods on YouTube. My God I couldn't do that with my tires. I did stand over the tire but needed to use a single lever to work the last of the tire over the rim.
You can even use a rope?
In case it's too hard with tire levers/irons or pry bars
NO DAMAGE Tire Mount Dismount Change Bar Build, by sixtyfiveford on YouTube
Or just buy a whole gizmo such as the one John Salt+1 uses. Although Scotty Kilmer thinks it's a pile of shit. John Salt modified his.
Tire Balancing
Searching “reddit bubble balancer”, I find Reddit is convinced that tires should be balanced dynamically for best results, except for thin tires or bias ply tires.
But I'm well aware the hive mind can be erroneous.
Just an FYI, We used quality bubble balancers to balance very high end race car wheels+tires. Cars that exceeded 230 MPH on some tracks. Done correctly, a bubble balancer will give a good result.
the computerized wheel/tire balancers are not always 100% accurate. I've had balance jobs that were never right. That's why road force balancing came into play.
Remember, many computerized balance techs don't put weights on the outside of an expensive rim. They stick 'em on the inside, often dead center. That is in no way, a proper dynamic balance. AND it often works just fine. Cujet on bobistheoilguy.com
Static - Bubble Balancer
Y Method for Static Balancing by sixtyfiveford on YouTube. Also describes the difficulty in finding a quality bubble balancer.
Upgrade for Bubble Balancer by Mad Ginger Customs on YouTube. This guy likes to talk.
More Expensive Upgrade for Bubble Balancer by John Salt on YouTube. Perhaps add a more precise bubble level? See image. Although there isn't room for a larger one.
The following is probably a bad idea because leveling the tire on the cone is near next to impossible. Though this is done on a shop machine with a threaded shaft and brace pushing onto the cone. Anyway, with these two more items it just got more expensive. I originally wrote:
Seems to me that it would be less expensive to buy a centering cone and hang it from a thin rope/cord, instead of the bubble balancer or motorcycle wheel balancer options below. Challenge is how to get the rope in the center of the cone. Surely someone has thought of this? I've searched without success.
Harbor Freight Bubble Balancer. A Long Term Review And Demonstration. by FarpointRestorationsAndRepairs on YouTube.
I asked him: “Did you ever make the comparison video between the static balance,dynamic, and road force balancer?”
Answer: “I really need to. I did one, but not on film. The results? Bubble is dynamic was no more than 1/4 Oz change.”
Digital Wheel Balancer Vs Bubble Balancer comparison by Gerard Burke on YouTube.
Dynabeads Review by William Connor. Dynabeads just sounds wrong to me. Here's a positive review by Warped Perception on YouTube.
Static - Motorcycle
Marc Parnes saying motorcycle static balancers are superior
Will a bubble balancer work for a motorcycle wheel? Reddit
Static Tire Balancing by Robert Deptula on YouTube. He has a bubble balancer but prefers the motorcycle wheel balancer method (see end of video). But did he do upgrades to the bubble balancer? Based on the stiction movement I think I see, he didn't.
Dynamic
Dynamic Tire Balancing by TarzanRiding on TikTok. Does not work. See mental exercise below.
Mental Exercise for Dynamic Balancing
Also the dynamic balancing by spinning the wheel after the static balance, and moving the applied weights in or out by trial and error. No, this will not work, and here's why:
The weight distribution for being out of dynamic balance yet statically balanced, would be weight half on the inside and half on the outside of the rim, each half opposite radially. The static weights you just applied on the centerline of the mass of the rim, you can just keep them there. You now have no idea where to apply weights for dynamic balance.
Referring to pre-70's: “Tires were also spin balanced on the car both balancing the tire, wheel and drums of rotors. We also spun heavy duty truck tires on the chassis.” edp9743 on YouTube.
“Useless if the tires are out of round you cannot tell that with a bubble.” danielleclare2938 on YouTube.
Way Too Advanced Tire Balancing by the GADGETS playlist on YouTube.
Shop Balancer Instructions
Know how so you can correct the guy at the shop. Especially if you ask them to double check and the tire doesn't show as balanced: ask right after they balance one, to remount the supposedly balanced tire and check again.
Full Documentation by derekweaver.com.
- If using a plastic hub-centric ring, it should be removed before mounting on the machine. I'm not sure about an aluminum one?
- Mounting is critical.
Mounting Instructions by Hunter Learning Channel on YouTube.
How to Use a Shop Dynamic Wheel Balancer by Brunton on YouTube.
Rim Balancer
Maybe the best way is to remove or apply weight using the same strategy as in tire balancing above. Weight removal could be by sanding / machining. But this may affect road force balance?
DIY Dynamic Rim Balancer by Jeremiah on YouTube.
My ideas why this won't work:
- The axle would have to be perfectly rigid so the long length is a terrible idea.
- Having contact with the cutting tool is going to affect the movement so it will end up cutting all over the place rather than the unbalanced weight.
- As one commenter pointed out, the eccentricity of the movement will not match the unbalanced weight except at a certain RPM.
Wheel Alignment
Wheel Alignment by That Shop Teacher Guy on YouTube.
Camber by Subearu on YouTube.
Toe-in by Embark With Mark on YouTube.
Toe With a Laser Level by Scott Gress on nasaspeed.com
DIY Car Alignment with No Special Tools by Budget Outlaws on YouTube. There's no way I'm doing the string method. Holding a level steady to measure camber? No way!
https://www.hagerty.com/media/opinion/the-hack-mechanic/using-a-do-it-yourself-camber-gauge
https://www.motortrend.com/how-to/ccrp-0910-diy-alignment-guide
Easy visual toe alignment check
For toe, I like to use the wheels themselves for reference. I use the tire sidewall plane as a sight on the other tire, or something pressed onto the other tire. If the steering wheel is straight, then the sight point on the other tire will be the same on either side of the car.
For the front wheels, it doesn't have to be exactly the same on either side, because toe-in is the difference in alignment of one wheel compared to the other. When driving in a straight line, the caster will even out the difference to track straight. Caster and camber are responsible for the vehicle driving straight.
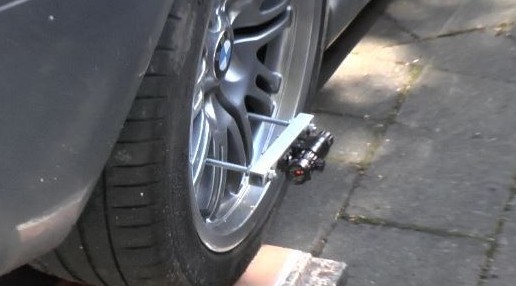
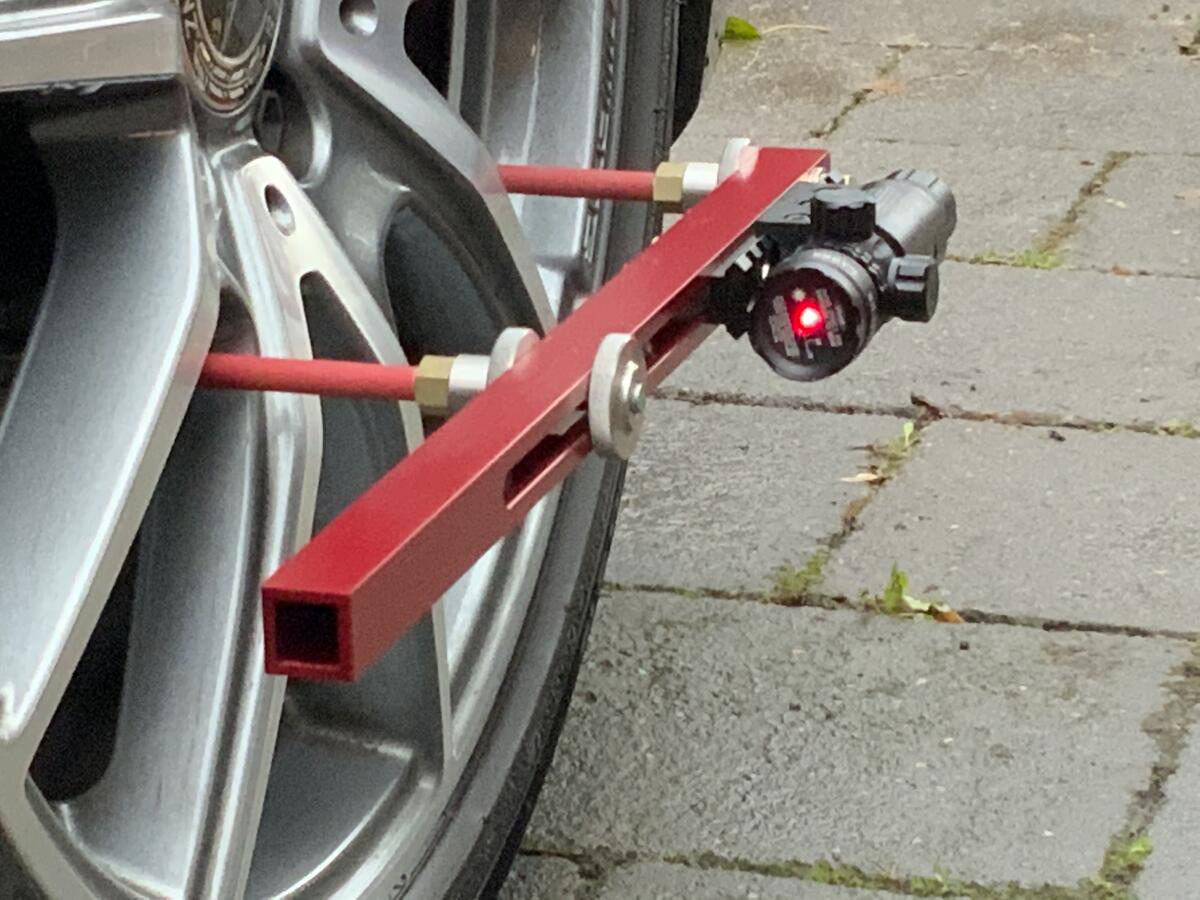
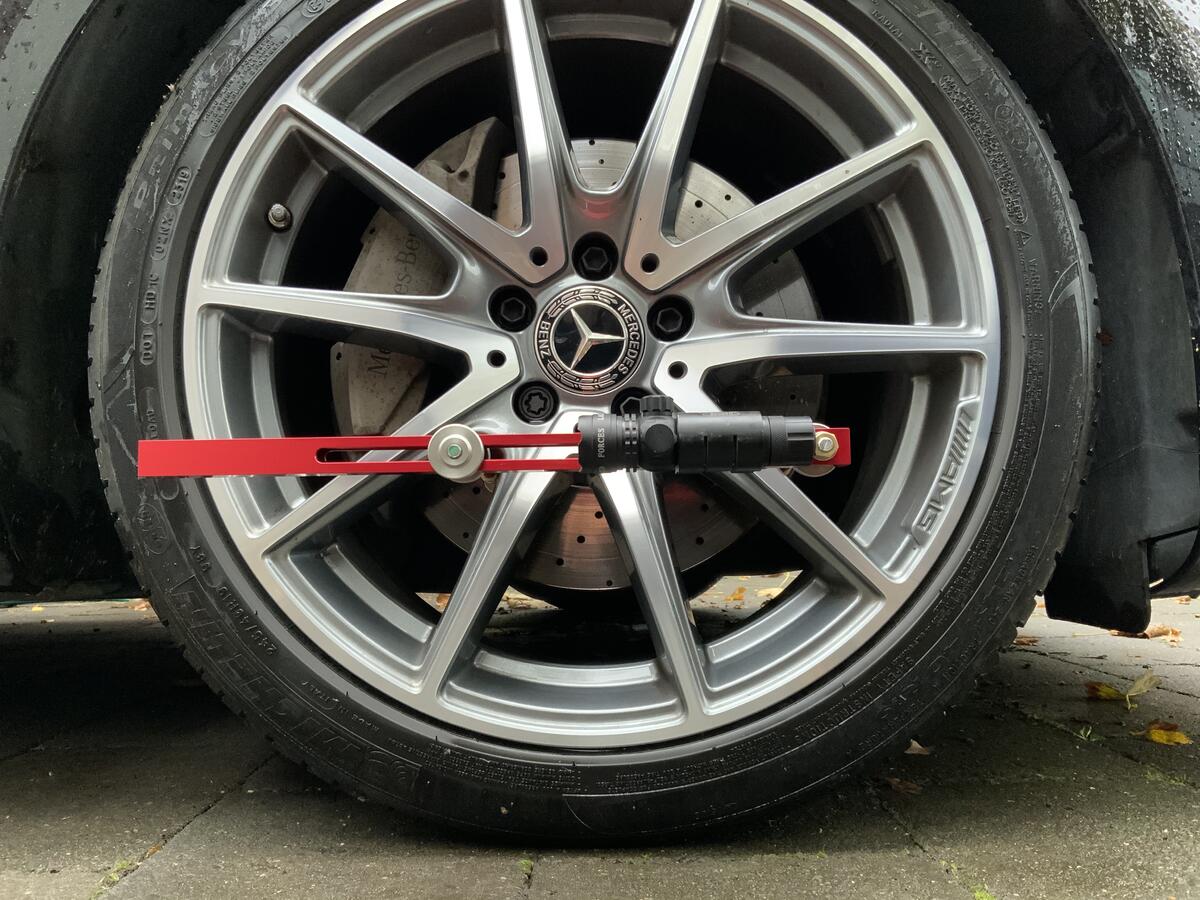
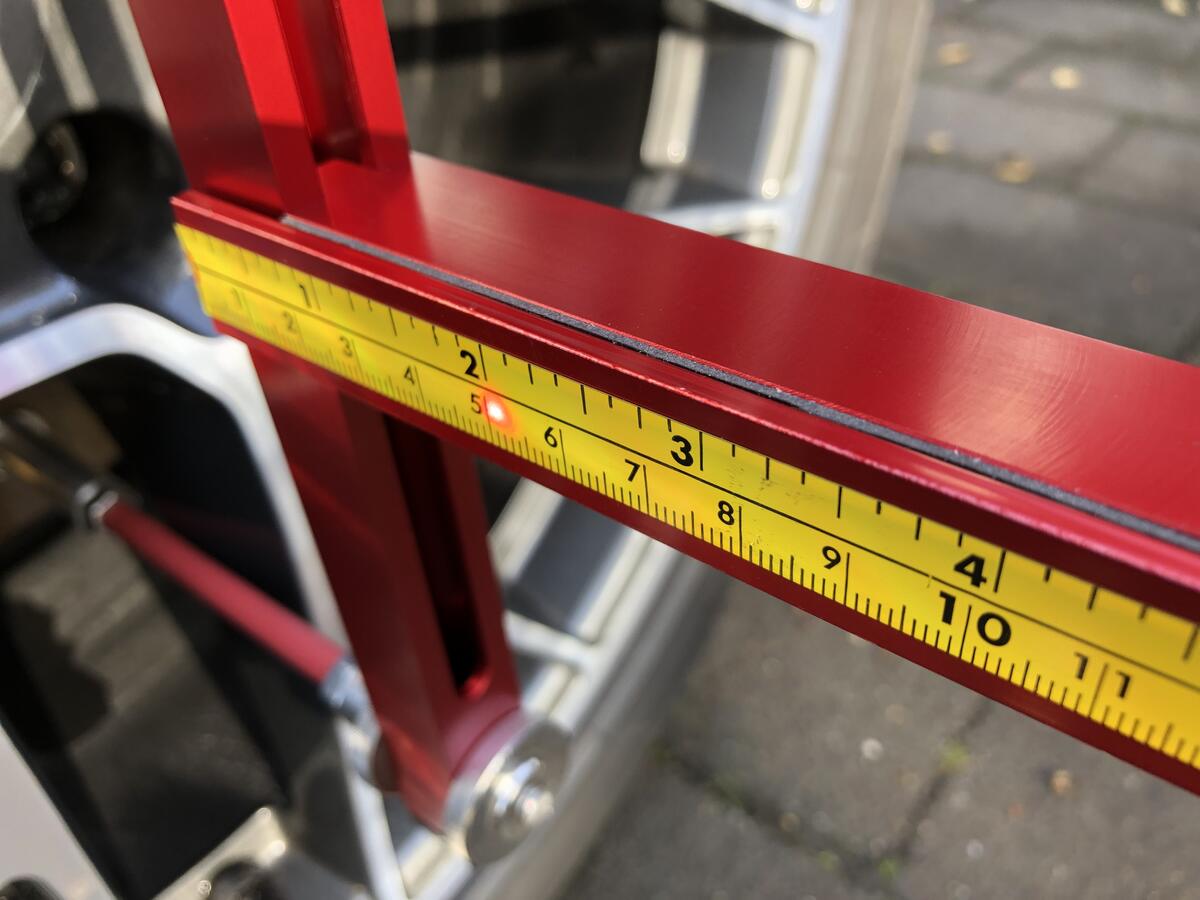
Maybe my toe alignment isn't popular because the tire sidewall could have deviation? Maybe lasers could be used… Ha! Found a link: Toe With a Laser Level, Scott Gress
To do an alignment on a vehicle with independent suspension, the weight of the car needs to be on the wheels.
So the wheels are free to slide, turn plates are nice because you don't have to roll the car back and forth to settle the suspension.
DIY turn plates: 2 squares of slick, texture free vinyl floor tiles, without sticky-back, with salt applied between them. I've been told oil and grease are too messy.
Settling of the suspension without tools is done by push-rolling the car forward. Does push-rolling the car forward create a drag force unlike when the wheels sit on turn plates?
If your floor is not level, you can also stack vinyl flooring to even out the height differences under the wheels.
Camber and toe require the steering wheel be centered. “If you don’t have a steering wheel lock, you can move the seat all the way forward and jam a helmet between the steering wheel and the seat.” Wayne Scraba
If you don't have the expensive LongAcre caster and camber tool That Shop Teacher Guy has, the formula for caster can be had from Subearu's camber tool measurements:
caster (deg) = (180 / 3.1415) * [(camber1 - camber2) / (turnangle1 - turnangle2)]
For a 40 deg change in turn angle,
caster = (180 / 3.14) * (camber1-camber2) / 40 = 1.43 * (camber1-camber2)
I don't have easy access to my wheel spindles. I want to have a set of inexpensive wheel clamps to make things easier. One magnet on the disc brake may be a little off, but two is good enough to make a reliable base for the laser toe-in tool and bubble camber tool.
If you don't have a pit from which to make your adjustments like at the alignment shop, you are shit out of luck and have to raise the car to adjust camber as Subearu did. Unless your vehicle has naturally curly hair, er, I mean has “good ground clearance”.
Storing The Car
- Cover to protect from elements
- Don't use the parking brake for long term
- Start the car every 2 to 3 weeks
- Drive the car to lubricate the gear boxes
- Run the air conditioner
How Often Car Need to Be Driven? by Auto Zone on YouTube.
Car cover
Should not be waterproof so that humidity isn't stored inside the car? Reflectivity helps keep the car cool in the sun.
Charging the Battery
Modern cars have electronics that continuously drain the battery, requiring that the car be charged as often as once per week if left without use.
A lead-acid battery, measured without load, should not go under 11.9v. It only takes a dozen or so cycles under this voltage to ruin a battery.
“Batteries can be very long lived if they are charged at a float voltage of 2.20 to 2.30 volts/cell (at 25 degrees C) (13.2V to 13.8V for a 12 V battery).” digikey.com
A charger should have a charge controller to avoid overcharging the battery.
If using a solar panel along with a charge controller, keep in mind that the charge controller uses battery to function. So cloudy days and shade can result in a net drain. See more molecules on YouTube.
For 2000s model cars, it's likely ok to charge the battery while still connected to the car, but newer cars may have more complicated electronics? I don't know.
If you have to disconnect the battery, remember to connect the positive terminal first, then the negative terminal.
Can You Start a Car with a Battery Charger Connected?
Starting your car when the battery is charged and the battery charger is connected as well isn’t that much of an issue, and you can start the car easily.
…
Starting a car on a dead battery with a charger connected can cause the fuse on the battery charger to blow out or burn the charger itself.
You can restore a battery with a welding machine Project Farm
Oil Change
Is it ok if oil is overfill by this much? Reddit. A little is ok, but how much is too much? The dipstick was at the low mark so I added a quart. Now it's quite above the high mark.
Note: accidental overfilling oil into your engine can cause problems too. As the crankshaft rotates it will churn the oil, causing aeration and eventually sustained foam may form. This can lead to overheated motor oil, oxidation and a loss of oil pressure. Spongy aerated oil is hard to pump. It starves the engine and critical lubricated surfaces. Jim Fitch at machinerylubrication.com
My car calls for 5W-30 for cold climates and best gas mileage. However, the owners manual further states: “Recommended grade and viscosity under severe driving conditions. If the vehicle is used in desert areas, in areas with very high temperatures, or is used for heavy-duty applications, use of oil with the following grade and viscosities is recommended.
API classification SM (or SL):
SAE viscosity No.: 30, 40, 10W-50, 20W-40, 20W-50”
Given my engine has 100K miles, I'll be using 20W-50. I'll be waiting a minute after starting the car so the engine warms up before applying load.
Brake Fluid
ELM327 / ODB2 Scanner
If you have a Bluetooth ELM327, and have connectivity issues, one last thing to try is to download different software. That worked for me. For some reason the software made for my ELM327 doesn't connect.
After reading numerous sites and forums, I think it's fine to clear an error code after logging it for future reference. Sometimes there's a glitch and the error doesn't return. For example, random codes can pop-up from having disconnected the battery.
After clearing a code, if the problem persists the error may not return immediately. Some issues require driving a sufficient number of miles (50-70) for the computer to re-diagnose the issue.
For emissions related issues, after clearing the code(s) you will have to wait through a “drive cycle” before the engine light comes on. That can take several weeks, although you can look in your car's owners manual for more specifics.
This Car Scanner app shows which emission tests haven't passed, though it doesn't distinguish between “hasn't passed yet” or “failed”. The engine light will let you know of a fail.
Exhaust Manifold Coatings, Wraps, and Heat Shields
Some super thin ceramic coatings may change surface emissivity but won't much change the surface temperature of the exhaust. I kept seeing really convincing pieces such as this popularhotrodding video. I'm amazed by how deep the marketing rabbit hole goes.
An rx7club.com forum helped guide me away from false marketing.
Exhaust Leaks
Grease for Electrical Connections
Dielectric Grease is what you will use for automotive applications: Moto Mythbusters Dielectric VS Conductive Connector Grease, Taco Moto on YouTube.
Engine Sound: Piston Slap or Worn Valve Clearances
My engine has a more faint version of the clanking sound in the YouTube video referenced in this forum thread. Also could be a need for valve clearance adjustment, as can be heard in this video. The sound lasts a few minutes on cold startup, and goes away more quickly if I rev the engine.
Engine Overhaul or Rebuild
Performance Engine Rebuild by Project Farm
Total Overhaul at 100K by Project Farm:
“Let's go through a vehicle that has over 300,000 miles on it from top to bottom and front to back to prepare this vehicle for another 100,000 reliable miles! Includes rust repair, front end rebuild, complete tune up, axle hub bearing replacement, fluid changes, new brakes and rotors, front end alignment, headlight bulb replacement, MAF sensor cleaning, tensioner pulley bearing replacement, fan clutch replacement, axle seal replacement, and A/C freon level check.”



Discussion